If you have a Nook Color and you want to get the most out of it, I recommend that you consider rooting it or in Nook Color hacking terms, "nooting" it. Nooting, as opposed to totally rooting it and installing a custom OS, preserves the stock Nook Color that comes with your device BUT it opens it up so you could install Android apps and turn it into a full-featured tablet! You could even overclock it up to 1.3 Ghz with no apparent hit on battery life, making it really smooth and zippy, even when running the Nook Home software. So you get all the advantages of a stock Nook Color tablet like the interactive books, the sharing features, the Nook App Market and the total integration with your Nook account AND you could install all the apps you may want like the Kindle Reader, Kobo Reader, Netflix, games like Angry Birds for free, comic book readers, the sky's the limit!
There are other ways of doing this, like either totally wiping the stock software and installing a full build of Cyanogen Mod 7 or installing it on micro-SD to preserve the Nook software, but I finally chose and settled to just manually noot it and install it internally. Why? Compared to these other methods, it's the most stable one for me. And the Nook app on Cyanogen is buggy and you don't get all the features of the baked-in Nook software.
So if you want to try this yourself, here's an outline of the steps I took to get my perfect Noot:
(I'm not linking sites to this post, so just Google the files yourself)
You'll need:
1. Yep, a Nook Color preferably running firmware 1.3
2. A micro-SD card (at least 1 GB)
3. A micro SD to SD adapter and if your computer doesn't have one, a SD card reader
Now, the files and software you will need (I'm using a Windows 7 machine for this guide, it's the most straightforward process) :
1. WinImage (Windows software so it's an .exe file and you have to install it)
2. Clockwork Recovery v 3.2.0.1 (should be a .img file)
3. (optional) Nook Re-Partioning tool to 5 GB (just Google Maurice Mongeon Repartition Blue Dot Nook Color,. I'll explain this later)
3. Manual Nooter 4.5.18 (zip file)
4. Manual Nooter 4.6.16 (zip file)
5. Update-Froyo1.2-Dalingin-OC-emmc (Dalingrin's Overclocking Kernel for internal installs. it's a zip file)
6. Ham and Cheese APK enabler ( another zip file)
1. OK, first step is to format your micro-SD card. Now, remember the drive letter it was assigned with.
Now, install WinImage then run it. Select the drive letter where your micro-SD is (via Disk drop-down box). Now, select Disk> 'Restore Virtual Hard Disk Image on physical drive", a pop-out box will show up indicating the location of your micro-SD the hit ok then navigate to the Clockwork file image you have downloaded then select it. A few warnings about data being erased will appear, just click OK and a "Writing Data' progress bar should now begin the process. Once this is done, the SD card should remount with these 4 files inside: u-ramdisk, u-image, u-boot.bin and MLO.
2. If you have these files, then your micro-SD is ready for booting your Nook Color off from it. Next step now is to copy all the zip files I enumerated to the ROOT of the micro-SD. Don't put them inside folders just Just paste them straight. Also, don't unzip them, at all.
 |
| CWM Menu |
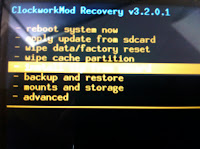
3. Now that your bootable micro-SD is ready, turn your Nook Color off then insert the micro-SD to the Nook's slot then boot it up. It should show you a screen with the word 'LOADING" flanked by two burning skulls. Once it loads, you should be right in the Clockwork Mod (CWM) menu. Now we need to wipe the Nook Color clean by selecting the option 'wipe data/ factory reset' and let it do its thing. If you have lots of your own content, then I recommend backing them up. If they're just downloaded Nook content, don't worry about them, you could sync again from the Nook cloud.
 |
| Installing Zips |
 |
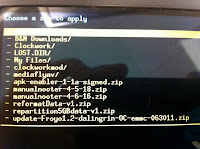
| Make sure you select the correct zip |
(OPTIONAL) Ok, now this step for me is critical. Apparently, there are two Nook color versions out there. The older ones with a 2 GB hidden partition (leaving 5 GB for user) and the newer ones with the blue dotted box with a 5 GB hidden partition and just a 1 GB user partition. Why is this critical? It means that if you stick with the old partition tables, you could only install about 1 GB worth of apps! Not really good, especially if you're planning on installing a lot of games. The newer partition lets you install up to 5GB. The only downside is that your Nook content like books and magazines will be in the hidden drive so you can't copy and backup them up anymore. For me, I'd rather have the 5GB application space because the downloaded content I could always sync from the Nook Store anyway.
 |
| Flashing Process |
So if you want more app space, then select 'install zip from SDcard' from the CWM mode then select the 'repartition5GBdata-v1.zip'. ( You could aways reverse it by applying the 1GB version anyway). Once this is done, your data should now be wiped and you're now ready to noot your Nook Color.
 |
| Initial NC setup: Video Tutorial |
4. Remove the microSD first then reboot (it always boots to the CWM interface if you have the CWM micro-SD in) then just set it up normally like a new Nook Color (it's now running the stock Nook Color software) Make sure you go through all the motions to register your device and link your account to avoid any problems later. Once you've done that, try re-syncing your purchased content from the cloud and download a few books or magazines to make sure they're syncing fine. Once you've verified that everything is in working order, reinsert your microSD then reboot.
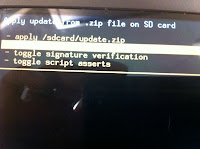
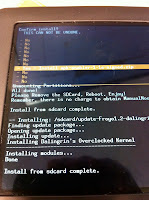
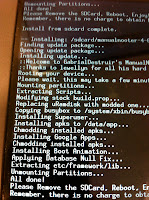
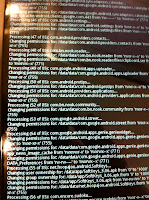
5. Once rebooted, you should be back in the CMW menu. Select 'install ZIP from SDcard again then in this order, apply these patches: First off, run Manual Nooter 4.5.18 (some advice on rebooting after every install, but I did them one after another without ill effects). After that, the second zip file you need to run is Manual Nooter 4.6.16. Now, third file is the Update-Froyo1.2-Dalingin-OC-emmc zip. Once that file is done, finally run the Ham and Cheese APK enabler. Once everything is set, pop out the microSD then reboot again.
 |
| MicroSD Browsing |
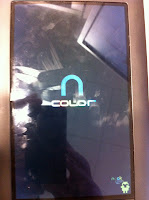 |
| Splash Screen |
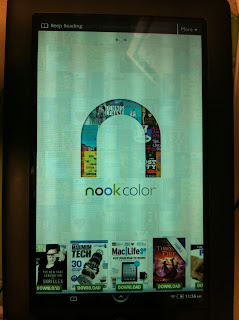
6. You should now be greeted by a different boot splash screen. If you see the multi-colored Nook Color logo, then it means you are nooted and you are in the right track!
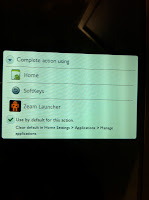
7. You'll land on the stock Nook Color homepage now but when you press the home button you'll be asked to choose what action do you want to take. The best option is to check the Zeam Launcher and leave it alawys as default, that way, it would feel like an Android tablet. You could always go back to the Nook Home page with other methods. First go to ROM Manager, follow the steps then select 'Fix Permissions'.
 |
| Zeam Launcher |
 |
| Fixing Permissions |
8. A Market icon should now be on your apps grid, if you select that you'll need to set-up your Google account. Just follow the steps and in no time, you'll be in. First app I recommend is NookTweaks. This app will let you overclock your NC to up to 1.3 Ghz and increase your sound volume output too. (a word of caution though, be careful when tweaking the clock speeds, it seems like when I select something other than the default preset of 1.2Ghz, the NC will freeze, so I just let it stay that way and just check 'Set on Boot'.
Next crucial app will be Titanium Backup (which lets you backup your apps on a SD in case something goes wrong) and don't forget a File Manager like ASTRO to let you side-install downloaded APKs and delete files.
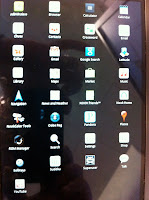 |
| App Grid |
Also make sure that you 'Allow Non-market apps' through 'NookTools' (this option is not available on mine, it just gives me a warning about NookTools needing to be installed on system/, I still have it tickbox checked).
 |
| Market Account Setup |
So after this, just explore and you'll get the hang of switching between the Stock Nook Home software and the modified Android homescreen. Other apps to try are Netflix (through the market), Amazon Kindle (market), Kobo (market), Mobo (market), Dolphin HD (via browser download), Perfect Viewer (market), Spotify (if you're a premium user), Pandora (market), SQLite Editor and Root Explorer. Plus you could install all the games you want (either via market, Amazon app store or browser). Or even play video-game emulators (PSX4Droid works but sometimes slow and buggy). So it's pretty much sky's the limit'!
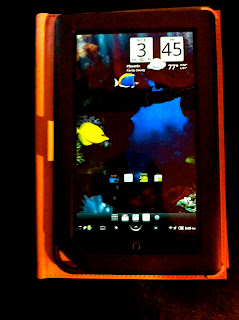 |
| Nooted! |
IMPORTANT SIDENOTE: Never upgrade your Flash Player from the one provided by the Manual Nooter (version 10.3.185.22). If you do, you'll be stuck in an unrecoverable splash screen loop. The only option you have if this happens is to wipe your Nook clean and refollow these steps then restore your apps via Titanium (this is why Titanium backups are important).
So yeah, it's great fun having this nooted Nook Color. It expanded it beyond what is was meant for immensely but still preserving that total Nook Color experience. I haven't elaborated much on the stuff it could do. That's for you to find out. So give it a shot if you're bold enough and remember if anything goes wrong, you could always wipe it, restore it and start over.
And remember, if you mess up, I claim no responsiblity. Follow this guide at your own risk.
Kudos!


